Monday, December 18, 2006

Day Trip 12/16

I left Indianapolis about 10:30 and walked into the cottage a little before 1:00 on Saturday. We (CMV and I) made a decision to eventually remove all of the drywall in the house. The exterior walls are moldy, damp and poorly insulated, and the interior walls are not much better. I want as much of this completed before springtime comes, so I decided to remove the rest of the drywall in the bedroom.

I first removed the remaining pieces of trim molding and set them aside to take with me when I return home. I next, removed the electrical outlets and fixtures and pulled the carpet out of the room. Lastly, I went at the drywall with the pry bar and a hammer. My goal was to get as much drywall out of the house as I could and still leave that night. In the end, I cleared the remaining four room surfaces, and one wall in the other bedroom.


Once the bedrooms are stripped of drywall, we can make any necessary repairs and add insulation to the outer walls. We will also be able to hang the drywall because there will not be any need for plumber access.

In the wall cavity, I found a large abandoned wasps nest. I was very thankful it was not active, as I disturbed it quite a bit while pulling on the old drywall. If it had been active, I would have suffered from the encounter.

Little Jobs 12/09

This weekend, my friend JSE and I went up to the cottage on Friday night. We didn't expect to get much done that night, but wanted to be there in the morning to get working.


We went up without an agenda, and did not know what we were going to get accomplished. The first task we decided to tackle was to rebuild the corner cabinet in the kitchen. In order to do this, we first needed to buy a roll of insulation and a sheet of drywall. The rest of the kitchen drywall will wait for the plumber to install the pipes in the spring.


With the Insulation cut and in place, we hung the drywall and secured it in place with screws. The cabinet was rebuilt and attached to the wall. In order to clear up some space, we moved all of the cabinets back into the kitchen and set them in their approximate final location.


It was now time to repair the frame on the bathroom/ bedroom border wall. Two studs were removed and replaced, as well as a section of the bottom plate. There was no way to remove the studs without damaging the drywall on the bedroom side of the wall, so we completely removed it ahead of time. After cleaning up the pieces of drywall and almost filling the back of the truck, we could finally repair the wall section.


CMV requested that we bring her as many pieces of trim that we could, so she can work on them over the winter. I removed and labeled them (to ease the re-installation) and loaded them into the truck.

Not Feeling Like Work 12/2

We arrived at the cottage late in the afternoon on Saturday. Due to a loss in the family, I really didn't feel like working, but last weekend we left a large hole in the bathroom floor that had to be covered.

Instead of starting on the floor Saturday evening, I re-wired the electric in the kitchen. I installed new outlets, but left the old boxes. I will replace the electrical boxes when we install the new drywall in the spring.


Sunday morning, we finished replacing the floor joists and cutting the new floor. The bathroom floor will be tiled eventually, so we are only laying one layer of plywood.

There are one or two places in the wall framing that will require some work, but that will need to wait for another weekend.

Back to the Bathroom 11/25

This weekend, we removed the balance of the drywall in the bathroom. We also decided to pull up the old floor to level it with the concrete slab that leads to the bedrooms. When we pulled the floor boards, we were treated to a nice surprise.

The floor had been repaired at some point, and someone decided it would be a good idea to replace the joists with 2x4 and some 2x6 boards. These boards were held up with concrete blocks and scrap 2x4 pieces. Trying to figure out a solution to this situation had us puzzled.

Once we settled on a course of action, we got to work. The task took more time than our weekend allowed, so we were forced to leave a large hole in the house.


Wednesday, November 22, 2006

Drywall

As I said in the last post, we removed the drywall on the walls between the kitchen and the bathroom, and the cabinet wall in the kitchen. This accomplished two things; it made the job of removing the linoleum wall covering much easier, and it opened the wall to allow access for the plumbing installation next spring. If time allows, I may replace the electrical wiring in this part of the house since it is in the open.


Along with the drywall, we removed the bathroom sink, and the toilet. The bathroom is now ready for a tear out and replacement of the floor. The idea is to make it the same level as the rest of the house, as it is higher than the concrete slab.

Finishing the Floor 11/18

When we removed the cabinets a couple of weeks ago, we decided that the corner cabinet was going to be too difficult to remove. We thought that we would use the existing floor, and just cut the new floor around the older section. This continued to be our decision until sometime Saturday evening.

I met a friend (JSE) at the cottage on Saturday evening, and we started removing the drywall on the common wall between the kitchen and the bathroom. We also removed the drywall on the kitchen cabinet wall. This was a fairly simple process until we reached the corner cabinet. We stopped to figure out how to cut the drywall so the piece behing the cabinet would match the new sheets that we will hang in the Spring. The easiest and best solution was to go ahead and remove the cabinet.

Once the cabinet was out, I discovered the floor beneath was in terrible condition and had to be replaced. By this time, I have honed my flooring skill, and the job was completed in no time. It helped that the hole was only 24" x 24". With the final nail in the final floor board, the floor is officially complete. Well... at least until CMV decides it is time to lay down the tile.

Friday, November 17, 2006

Winterization

I still have some projects to complete before winter hits the area, but I am quickly running out of time. I need to get the water system shut off, and the pump removed before the freezing temperatures cause damage. I have been trying to hold off as long as possible on the water system, so I can still work in the house on other projects. I decided that I cannot wait any longer.

Sunday, November 11

I decided to drain the water system and remove the pump. I turned off the water supply to the pump and opened all of the faucets and let them drain into buckets. I let them run long after the water stopped flowing to allow every possible drop to escape the lines. I went back outside and shut off the well valve and removed the inlet hose. I was not completely sure of what I was doing, but it helped to know that I only needed to save two pieces of the water system; the water heater and the water pump. I could not remove any of the iron pipe fittings, so I removed the flex hose on the inlet and the flex hose from the water filter. Once the hoses were disconnected, I was able to lift the pump from the brick base and place it in my truck to store in the basement for the winter.

I still need to place a more secure closure to the flexible hoses to prevent anything from entering them over the winter, but other than that, the job is complete.

Kitchen Floor

I think that the kitchen floor has taken up way too much space on this blog site. I am sorry to report that while I worked on it this weekend, I did not get it finished, so there will be another installment next week.

What I did this weekend...

Once I got the water turned off, I was able to remove the sink and the sink cabinet. I pulled up the old floor boards in that area and replaced with the new plywood sheets.


At this point, the floor looked like this, and I thought that the project was complete. But if it really was finished, I wouldn't have told you that there would be another installment of "floor talk" next week. This is beginning to resemble one of the old western serials where you think it will never end.


Wednesday, November 01, 2006

Learning our way around the Kitchen (October 28 & 29)

There are several projects that we need to finish before winter shuts us down for the year. The kitchen floor is one of those projects. You may remember that we removed the carpet and some of the "filler" layers of luan sheeting. The floor under all of the patch pieces was one layer, but had several holes and cracks that allowed direct access to (or from) the crawlspace. With the colder weather on the way, the time is right to get this situation corrected.

The first step was to remove the cabinets. We have not shut off the water supply yet, so we had to leave the sink in place and work around the sink base. We are going to keep the cabinets, and replace the counter top next year.


Because of space limitations, we tried to work in 4-5 foot strips. We removed enough existing floor to allow us to place the next sheet of plywood. This allowed us an area to walk, stand, and to help keep the tools and trash out of our way.


We placed a layer of plywood down to form an even layer across the entire kitchen area, which is something we should have done in the living room before we put down the hardwood. The only area left to cover is under the sink base cabinet. We will replace that area on the next trip.


I think we both knew that this project was going to take quite a bit of time and energy, but I think we still underestimated what was involved. We worked the entire weekend, and stayed much later on Sunday than we planned.

We still need to do several things before winter. Some of these things are:

1. We got the initial layer of plywood down, but still need to put another layer of thinner sheets to even out the floor between the kitchen and the living room.

2. Shut off the water and remove the pump for winter storage.

3. Either blow out the water supply pipes, or remove them completely.

4. Take home everything that we don't want left there over winter.

and like every good list,

5. Whatever else comes up while we are doing the other items.

Hidden in the wall (October 21 & 22)

Well, it has been a few weeks, and no update, so I guess I should bring everyone up to speed.

CMV started to remove the shared wall between the bathroom and the kitchen. We spoke to the plumber a few weeks ago, and decided that we are more than capable of performing most of the labor ourselves. Since the water will be shut off over the winter, we also decided that it is a good time to start removing the drywall around the water pipes.


AMV was right when she guessed that there would be razor blades in the wall. I believe that the final estimate was at least 200 discarded blades. Do they still make medicine cabinets with a slot for old blades? I would guess they do not.


Monday, October 09, 2006

Plumbing Consultation


Saturday morning I met a local plumber at the cottage to discuss the plumbing situation. Having never owned a lake house, I am not very informed when it comes to cottage water systems. I spent close to 45 minutes going over the system currently in place, and his suggestions on what should be done to bring the plumbing to code.

RC (the plumber) is going to email an estimate for the work that he is recommending. Some of the suggestions are very good, and some of the other would be nice but probably not necessary. I honestly think that CMV and I could do most of the work ourselves, and reduce the labor hours but I don't know if RC would allow us to do this.

I did not take a picture of the plumber but here are a few of the water system.

These are water pipes leaving the bathroom and going towards the kitchen sink. These have been repaired recently, but not very well. At the very least, the hole should have been covered with an access panel.

This is the hot water heater. It is located in the storage shed near the carport. Ideally this will be moved into the house to allow quicker supply of hot water to all of the plumbing fixtures. This is one of the tasks that I think we can do ourselves, although it may lend peace of mind to have a licensed plumber perform the work. It will be interesting to see the monetary value of "peace of mind".

Deja Vu

This weekends project was to take up the carpet in the dining room. After spending time walking on the floor, I think we expected the same situation as we had in the living room. The first picture is the room before the job was started. We have been using the back wall of this room as a storage area for our paint and supplies.


This picture was taken after everything was cleared out of the kitchen. The room is now ready, and I can begin rolling up the carpet and padding. We are going to keep the carpet from this area for possible future use in one of the bedrooms. The padding will be thrown out and replaced if necessary.


As expected, the floor of the kitchen was patched in the same fashion as the living room floor. It appears at some point there was some repair work done on the septic system, and large sections of the floor were cut to provide access. Once the repair was complete, the holes were patched with plywood and then what appears to be luan scraps, covered with luan sheets.


The larger strips of luan were pulled up to expose the smaller scrap pieces placed here and there. In one spot there were four layers of luan. These smaller pieces were removed to leave one layer of flooring.

The floor that remains is poorly patched and in need major repair. The next step will be to remove the cabinets and then take up and replace the floor. Luckily this job is not very expensive to complete, but it will require a lot of work, removing the old floor.


Wednesday, October 04, 2006

She Should Have Used The Truck

Since the weather forced CMV to stay inside for most of the day, she decided to do a little bit of investigative work. She went into the bathroom and removed one of the sheets of paneling. What she found was very interesting.


Behind the bathroom paneling, was a mixture of old linoleum tile, drywall holes, rusty pipes, and water damaged wood. I can take care of replacing the bad wood, and hanging drywall. CMV can install tile on the walls and for the shower. My problem is trying to make sense of the plumbing system. We have a mixture of galvanized pipe, plastic PVC, flexible hose that resembles large aquarium tubing, and who knows what else. We may have met our match on this one. I am seriously considering calling a professional plumber.

Once CMV was ready to leave, she planned to take the scraps of paneling with her, only to discover it would not fit in the car. She should have used the truck this trip.

Storm Coming In

This past weekend, we didn't drive up to the cottage. CMV made the trip by herself on Monday since she had the day off. She drove most of the way in a rain storm, which added to her travel time. Here are a couple pictures that show the storm front as it rolled through the area.


Tuesday, September 26, 2006

Working (not fishing)

This week, I went up to the cottage alone. I hope this isn't starting a trend. I had planned on getting a few projects crossed off the "to do" list. I also planned on getting an earlier start on my trip, but I was delayed due to a project on our primary home (sorry, I am not starting another blog for that).

I ended up arriving around 3:00, and unloaded the truck. It was supposed to be a wet weekend, so I started on my first project while the weather was still decent. I needed to cut and install the shelf rail in the front porch. This has been one of those tasks that seem to go on and on, and it keeps growing and growing in the scope.

Before


After


As I was pounding the nails into the shelf, I quickly discovered the aluminum windows were very loose. One of them was held in place with 6 screws (out of 16). The weather was holding out, so I removed the three windows from the front of the house and realigned them. I had to replace some of the mounting strips and then secured them with new screws. The outcome is a much more secure and stable enclosure, that really doesn't show well on a picture.


I changed several electrical outlets throughout the house to three prong grounded outlets.

Contrary to what some might have believed, I did not spend the weekend fishing instead of working. When you consider that Notre Dame played on Saturday night, and the Colts played Sunday afternoon, I would say that I got quite a bit finished.

Catching up from last week


CMV made the trip by herself last week. I had the camera with me, so the pictures are from the next trip up.

She arrived late in the day Saturday, with a van loaded with bagged mulch for the flower beds. She also bought a few mums and planted them around the shrubs.


She them cut back the grass so we can see the edges (you can see the results in the top picture), and removed the last traces of the astroturf grass that once covered the walkway.

I will save the pictures of the floor tile until the project has been completed.

Monday, September 11, 2006

Can you dig it?


After the Notre Dame game I went outside and started digging in the flower beds. Calling them beds was a stretch. It appears that at some point in the cottages life, there was decorative gravel, at least two different types of mulch, a black mesh weed barrier that didn't work, and lastly, a black plastic weed barrier that prevented the bushes from growing roots down, but did nothing to prevent the weeds from growing up.

I bagged up 15 Contractor trash bags of garbage and loaded them into the back of the truck. To my credit, I did remember that I was going to need to lift the bags into the back of the truck before I filled them completely.


It is now up to CMV to finish the flower beds as she sees appropriate. I am not much of a landscape designer, and I know enough to leave that to the people that know enough.

All Before the Game


My first job of the weekend was to cut install the wall boards in the front porch. I needed it to be ready to prime by Saturday afternoon. It took a lot less time than I thought it would. Very rarely do I have a project that is easier than what I thought it would be so when it occurs, it is important to recognize that it happened.

It is sometimes uncanny how things work out, and by some strange twist of fate, I was between projects about 3:00p.m., on Saturday. It just so happened that the Notre Dame vs. Penn State game was on at 3:30 p.m. We did a fast trip to LoweĆ¢€™s, and I was back watching the game at 3:45 p.m. It was a great game. I don't want to give the wrong impression about what was happening here, i did get some work done. I had a chance to fill the nail holes in the porch wall with putty during halftime.

CMV Paints it

We drove up to the house on Saturday morning. CMV was armed with primer and rollers and set off to tackle the living room walls.

In some places on the outer walls, the old paint bubbled up when it came in contact with the new paint. After drying, the bubbles evened back out and looked fine. It was very odd. We thought that we were going to be forced to scrape and peel the entire room first.

After the primer came two coats of tan (I know that it has a name that is fancier than tan, something like Oat Straw or Mochachino, but I cannot remember what it was called) paint.


My description makes this project seem like it was a quick an easy job. I have failed to describe all of the preparation that went into the task. She had rough spots to smooth, holes to fill, and trim to remove. It was quite a chore, and it looks very nice.


Wednesday, September 06, 2006

The Floor Part 2

We needed to find someplace that could rent us another nailer today (Sunday) and would be open on Labor Day. We finally found a Home Depot store in Mishawaka that fit the requirements, and we started off on the hour and a half drive to the store.

We stopped nailing at 9:15 p.m. with 30 rows of hardwood floor nailed down. We didn't want to make any more noise that late, so we dry fit another 25 rows before setting up the mattresses for bed. Taking the time to dry fit the floor saved quite a bit of time in the long run. We were able to finish the remaining rows on Monday morning (about 11:30). CMV drove the tool back to Mishawaka and had 9 minutes to spare before we got hit with another charge for additional time on the rental.

We cleaned up, fixed some dinner, and left for home. Not much of a holiday, but the results look great. I need to finish that porch wall next week so CMV can start putting down the tile.


Here is the finished floor. We need to pull up the rest of the carpet in the kitchen area, and then lay the tile, but that is a project down the road. Maybe in a week or two.

The Floor


We decided that since this was a long weekend, we would tackle the floor in the living room. Currently, the room is carpeted with no distinction between the living room and the kitchen area. We want to lay ceramic tile in the kitchen area, and hardwood in the living room. We purchased some flooring (clearance) from Home Depot that we wanted to use.

I don't know if you have ever tackled a hardwood floor, but the key is preparation. We rolled back the carpet and cut off the padding which we saved for possible future use. The old floor had been patched with an odd layout of luan sheets. These had to come out and needed to be replaced with something a little more stable, like half inch plywood.

We finished the day having only torn up the old floor and nailed down the plywood sheets. Well, we did quite a bit more than this, but most of it involved driving around the area looking for plywood sheets and picking up the hardwood floor nailer. I found the nailer in Syracuse at the Syracuse Tool Shed, Inc. The only problem was that they were only open until noon on Sunday, and because of the holiday, they were closed all day on Monday.


Remember when I said the key was preparation? Well, we woke up Sunday morning, taped down the vapor barrier and then discovered that we didn't have the right nails to use on the first two rows of strips. The first couple of rows are nailed by hand, because the hardwood floor nailer will not reach them because they are too close to the wall. I had to leave to return the rented tool at 11:30 with only 3 rows completed. It was at this point that a frantic search of all local hardware stores began.

First Weekend

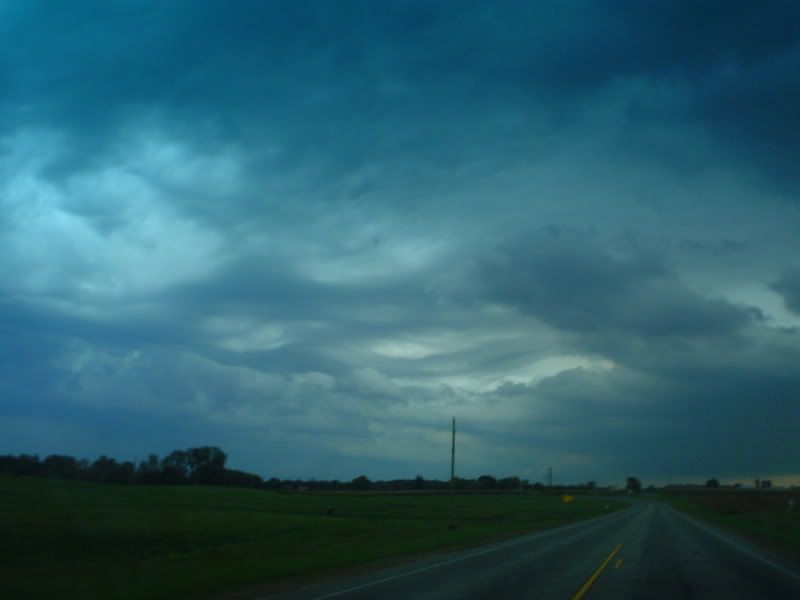
We left Indy at 7:30 on Saturday morning, armed with supplies, tools and building materials. I was anxious to get started on the wall in the front porch. The trip is about 2 hours and 15 minutes, but this morning it felt longer. I was anxious to get started on the wall in the front porch.

Upon our arrival, we unloaded the truck and met our next-door neighbors. They seem very nice, and offered to answer any questions that might come up.

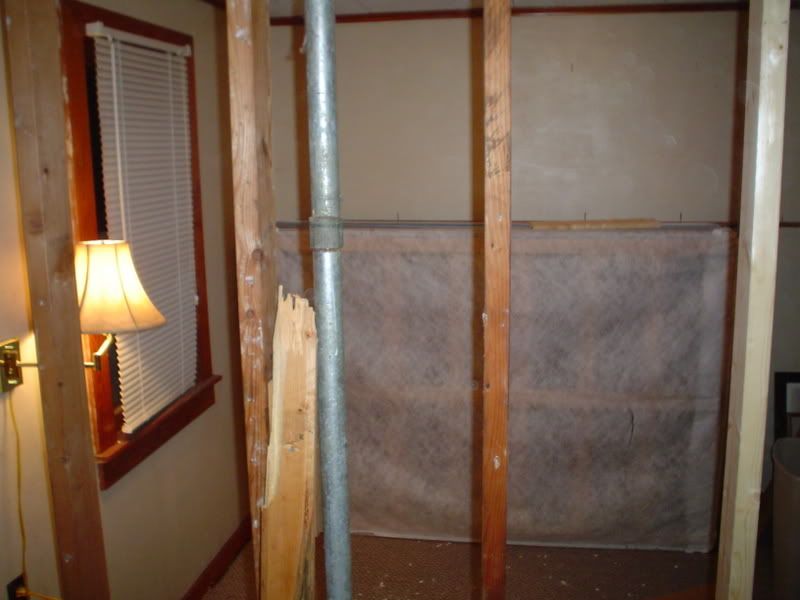
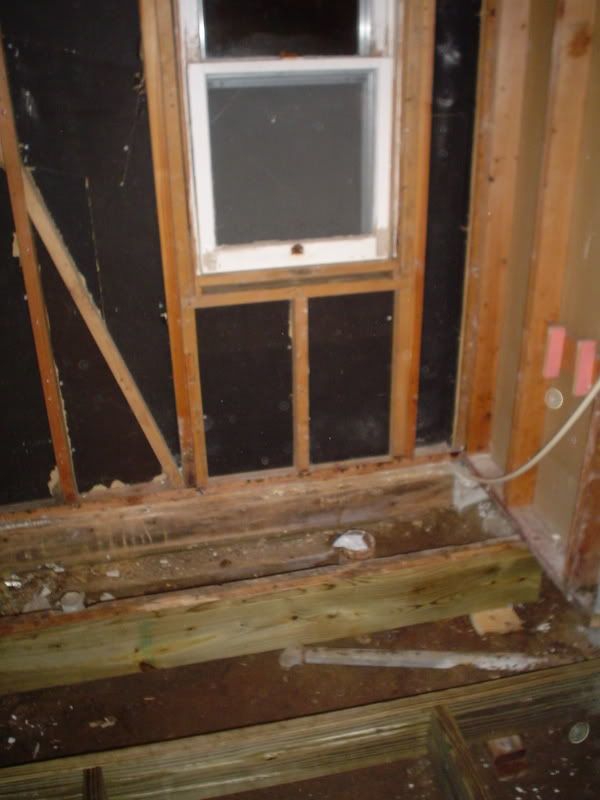
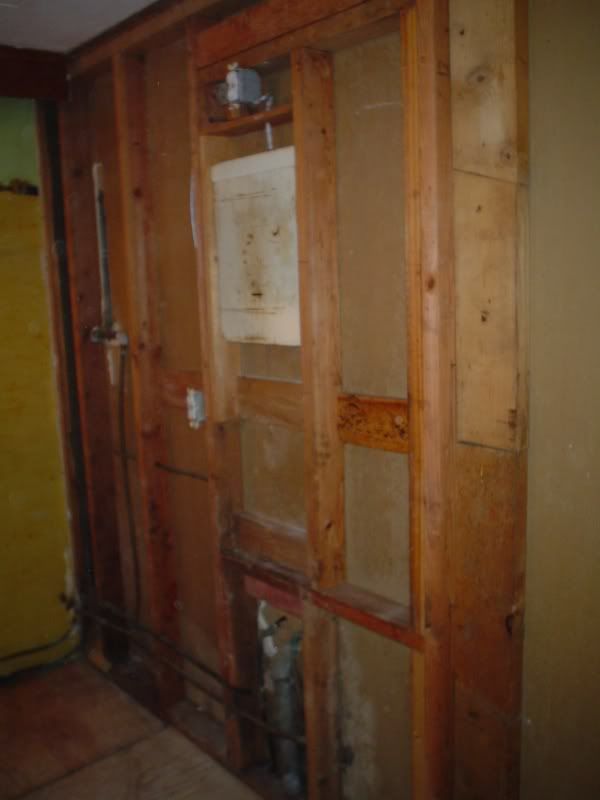
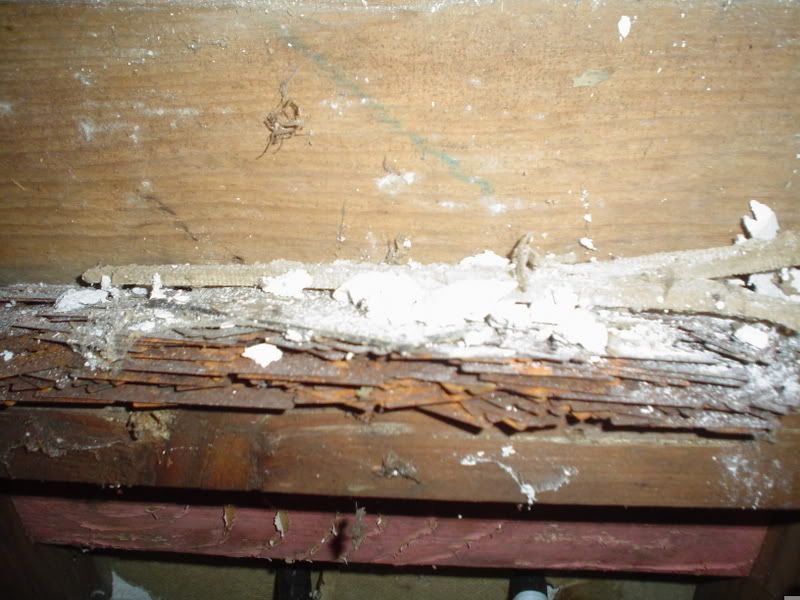
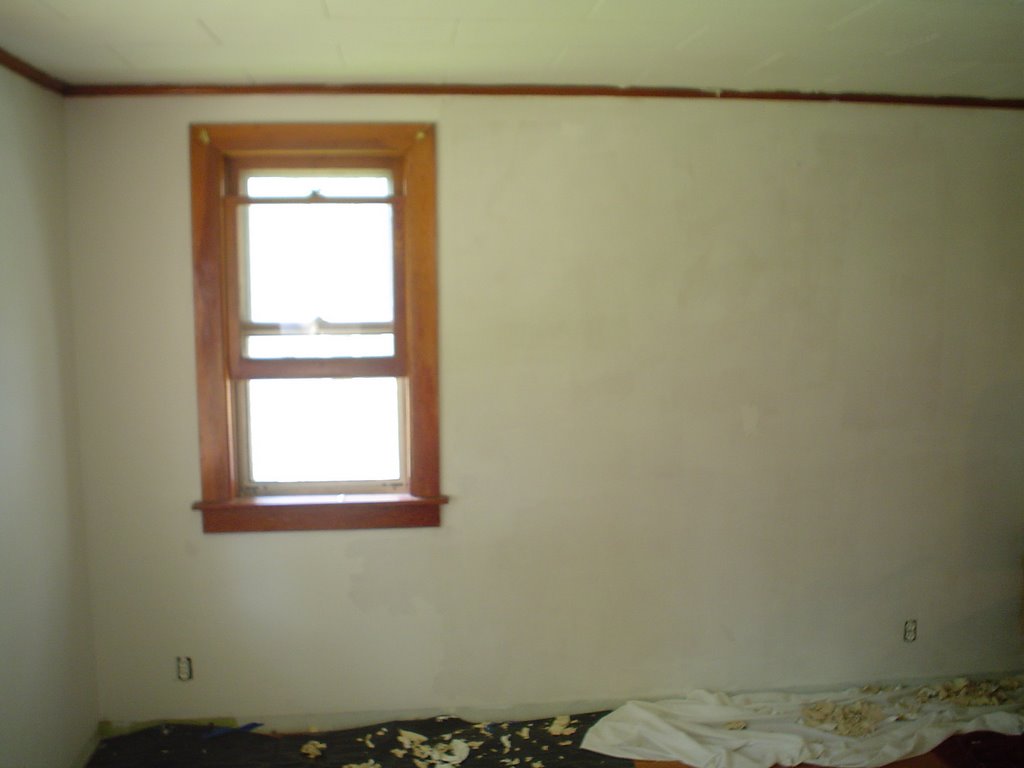
I went in the house and started removing the car siding panels that made up the interior wall of the porch. The planks were very easy to remove, as the top and bottom plates as well as the studs were completely dry rotted. This originally simple project was beginning to worry me. How much would I need to remove? How bad was it everywhere else? Why didn't the inspector find something like this?

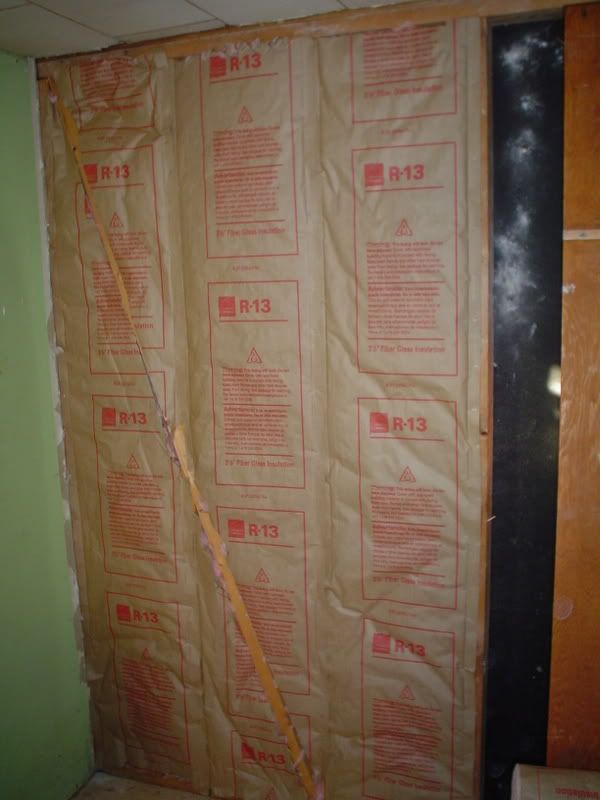
I removed all of the wall planks on the front side of the porch. The side wall was very solid, so I did not need to make any repairs to this area. I brought some 2 x 4's with me, so I cut them to length and decided that I should replace the plates with treated lumber. After the drive to the nearest Lowes, I returned with 2 pressure treated 2 x 4 x 10's to use as replacement top and bottom plates.

I needed to remove all of the original frame, but with the windows (and the rest of the porch) resting on this wall section, I felt that I needed to act carefully. I first replaced the bottom plate, and then toe nailed the studs into the bottom plate. The next step was to wedge the top plate between the window supports and the new studs. This made an immediate difference in the stability of the wall. I attached the studs to the top plate, and the top plate to the window supports, and was finished with the framing repair.

We needed to head back to Indy on Saturday night, so we decided to call it a day and pack up our things.

Closing Day

We drove up to ______ today and had the closing on the cottage. The closing was at 10:00 a.m. and finished around 10:45 a.m.

After taking possession of the keys, we had to drive over and check it out again. I wanted to change the locks and CMV wanted to get started making it ours. The first thing that had to go was the old maroon carpet that was in the front porch.


CMV quickly removed the floor molding and pulled up the carpet in no time. Oftentimes, one project will lead to another, and this was no exception. The carpet pulling disturbed a small colony of ants, that was no match against a can of Raid. We decided to wait until next weekend to open up the wall and assess the situation.

We finally bought a cottage


Our new house is located in _________, IN, and is on ____ Lake. We had the closing on August 21st. I will post a picture or two as soon as I get one.