Wednesday, April 10, 2013
Welcome to the 2013 Lake Season
This last weekend, we drove up to the cottage to open it up
for the season. What does that mean? It means we have to haul a bunch of things
from the house back to the cottage. We have to take all of the towels and
washcloths. We have to haul all of the sheets, blankets and pillows. We have to
haul all the cabinet stock item that would freeze if we had left it over winter
(shampoo, bug spray, sunscreen etc.).
In addition to the hauling, opening the cottage means
work. It means that we have to clean the
refrigerator that has been unplugged for the last four and a half months. It
means reconnecting the water system and restoring service to all of the
fixtures in the house. It means removing items (table, burn pit) from under the
carport and placing them where they belong in the yard. It also means that we
do some cleaning to remove any evidence that the place was closed up for 4-5
months. This was best accomplished by taking everything out of the house a room at a time.
We got a lot of our tasks completed, but still have work to
do. When we started this adventure, we thought we would complete a task and it
would be finished. We now know that completing a task means that it is only
complete until it isn’t any longer. Like any dwelling, upkeep is important. I
hope to keep you up to date on what is going on at the cottage. It amazes me
that after 7 years, we still have items on our original to do list. This
summer, my goal is to have the original items crossed off that list.
Monday, July 13, 2009
Pier (part two)
Since we bought the boat (exactly one week now), we had a pressing need to finish the pier. We put out three sections a couple weeks ago, but they were not strong enough to keep a boat secure. I assembled frams for three sections, and used one frame as the the first section in the water.
I had to install the decking and notch the pier sections so they would line up on the posts. I took most of the measurements from the sections of the pier that we are replacing.
Once the two sections were complete, we hauled them to the waterline (we used the truck, because the treated lumber was heavy) and replaced the outer two sections. We decided to put in a fourth section, and reused one of the older sections as the last. So, the section closest to the shore is a new frame with old decking. The next two sections are new frames and decking, and the last section is the old style.
Next week, I will take the new decking down to the pier and replace the decking lumber on the first section. We may or may not, wait until next year to replace the fourth and build a fifth section. We will also used a stain or dye to provide additional protection to the treated lumber.
Friday, July 10, 2009
Is It Ever Easy?
I made a trip to the License Branch this morning. I need to register and title the boat and trailer. I did some research last night, and brought everything that I thought I needed, but I was wrong.
The process for the boat was fairly easy. I had the original title that had been signed over to me, I had the right numbers filled in on the forms, I verified my address and flashed my Drivers License, and I had my watercraft stickers. So far, so good.
The trailer was a different story. I am the third owner of this boat and trailer. Obviously, I bought it from the second owner. The couple I bought it from have never titled the trailer, so they gave me a Bill of Sale. This is where the problem starts.
When the trailer was new (1984), Indiana did not require plates on trailers. When the trailer was sold to owner #2 (1986), Indiana required plates and titles. Owner #2 should have titled the trailer at the time of purchase. Here it is 23 years later, and I cannot title the trailer. The BMV cannot prove that the trailer was legally sold to owner #2 from owner #1.
My job now is to contact owner #1 and have him title the trailer in his name and then sign it over to me, as if he sold it to me. Another option is to have him fill out a Bill of Sale that would allow me to prove that he sold it. Luckily, his name is relatively uncommon. I would be in some real trouble if he was a Smith.
Update...
I found the original owner. The internet is great. He responded to my voicemail message with a voicemail message of his own. I called him back about 30 minutes ago, and spoke to him. I explained who I was, and what I was doing. I tried to express my desire to complete this task as quick and painless as possible. I was met with his desire to have nothing to do with the process. If I cannot persuade him to sign the papers and title the trailer that he hasn't owned in 25 years, I will have to go to Small Claims Court and seek a Court Order that would allow the BMV to grant my title.
The process for the boat was fairly easy. I had the original title that had been signed over to me, I had the right numbers filled in on the forms, I verified my address and flashed my Drivers License, and I had my watercraft stickers. So far, so good.
The trailer was a different story. I am the third owner of this boat and trailer. Obviously, I bought it from the second owner. The couple I bought it from have never titled the trailer, so they gave me a Bill of Sale. This is where the problem starts.
When the trailer was new (1984), Indiana did not require plates on trailers. When the trailer was sold to owner #2 (1986), Indiana required plates and titles. Owner #2 should have titled the trailer at the time of purchase. Here it is 23 years later, and I cannot title the trailer. The BMV cannot prove that the trailer was legally sold to owner #2 from owner #1.
My job now is to contact owner #1 and have him title the trailer in his name and then sign it over to me, as if he sold it to me. Another option is to have him fill out a Bill of Sale that would allow me to prove that he sold it. Luckily, his name is relatively uncommon. I would be in some real trouble if he was a Smith.
Update...
I found the original owner. The internet is great. He responded to my voicemail message with a voicemail message of his own. I called him back about 30 minutes ago, and spoke to him. I explained who I was, and what I was doing. I tried to express my desire to complete this task as quick and painless as possible. I was met with his desire to have nothing to do with the process. If I cannot persuade him to sign the papers and title the trailer that he hasn't owned in 25 years, I will have to go to Small Claims Court and seek a Court Order that would allow the BMV to grant my title.
Sunday, July 05, 2009
We got a Boat
Saturday, July 04, 2009
Again With The Trim
On May 19, 2008, I posted that we were finishing up with the trim around the windows and doors. I feel the need to clarify to you that the project made great strides, but did not get completed. I am sorry to have led you to believe that we checked another item off of the "little things" list. We have been working on the trim on and off again for some time.
The issue at hand is that with the elimination of the fiber board behind the drywall, and the addition of the dividing wall in the front bedroom, we do not have enough trim to complete the project. We found some ceiling trim that was very close and decided to make it work. The floor trim will be a close call. We are planning a storage rack/ bookcase behind a door, and that will free up some material. Hopefully in the next week or two, this one will come off the to do list for good.
Monday, June 15, 2009
Fitting in with our Piers
2009 marks the third summer that we have owned the Project Cottage. It is also the third summer that we have not installed a pier. It has never been a major source of concern, since we have been working on the house. We have access to our neighbors pier and have taken advantage of that access. While we have enjoyed the neighbor's pier, we have been feeling like we should put in our own. It would be one more step to becoming "Official Lake People".
The cottage came with three sections of pier. The sections were in pretty bad shape. I have been told by the neighbors, that the previous owners had not installed it for at least 6 years. The stringers were rotten on two of the sections, and the decking was weak and in some places, it was missing. If we were going to install the pier, it was going to take a construction project to do it properly.
I rebuilt the framed section of the first section (12 feet) and reapplied the original decking. I used short screws, so I could remove them easier when I added the new decking. We used the other two sections with plans of replacing them with new units in the near future. In the mean time, the pier provides us with an area of our own.

Trust me, it looks a lot better the darker it gets.
The cottage came with three sections of pier. The sections were in pretty bad shape. I have been told by the neighbors, that the previous owners had not installed it for at least 6 years. The stringers were rotten on two of the sections, and the decking was weak and in some places, it was missing. If we were going to install the pier, it was going to take a construction project to do it properly.
I rebuilt the framed section of the first section (12 feet) and reapplied the original decking. I used short screws, so I could remove them easier when I added the new decking. We used the other two sections with plans of replacing them with new units in the near future. In the mean time, the pier provides us with an area of our own.
Trust me, it looks a lot better the darker it gets.
Friday, May 22, 2009
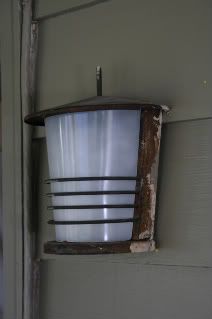
Porch Light
Every time we enter the cottage, we walk past the porch light. It hangs there, dirty and rusty, reminding us of the neglect that it has witnessed. I decided that this was the weekend to repair or replace that light.

I shut off the power and removed the fixture. I capped and taped the wires so I could turn the power back on. It didn't take much time to disassemble the light. I sanded the pieces, removing all of the dirt and rust. Once I had the metal sanded and clean, I was ready for the paint. We chose to paint the fixture black and pewter. The pewter is the color for most of the visible sections, and the black was for the "shadow" areas.
Thursday, May 07, 2009
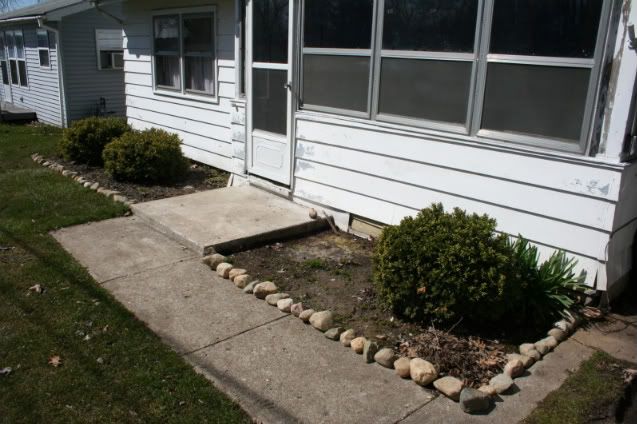
Rock and Roll
In an effort to control the amount of water that pools in the front of the house, we felt the need to raise the level of the flower beds. In order to raise the level, we needed to use something to hold in the additional material. We decided to use Indiana field stones. The best part about using Indiana field stones, is that they are readily available, and typically free. Oftentimes, you can find large piles of stones in the corner of crop land. I would encourage you to ask permission before removing the rocks.

I gathered about 75 stones and transported them to the cottage. My "source" is on the route from my house to the cottage, so it was pretty convenient. I dry fit the stones, by placing them on the edge of the sidewalk. It would have been just as easy to place them in their final resting position, but I wanted CMV to make the final call. If she wasn't happy with the look, they would not last very long.
Once the stones got the nod of approval, we moved them to the edge of the bed. The flower beds were ready for some additional dirt and mulch. Some flowers might not hurt either.
I gathered about 75 stones and transported them to the cottage. My "source" is on the route from my house to the cottage, so it was pretty convenient. I dry fit the stones, by placing them on the edge of the sidewalk. It would have been just as easy to place them in their final resting position, but I wanted CMV to make the final call. If she wasn't happy with the look, they would not last very long.
Once the stones got the nod of approval, we moved them to the edge of the bed. The flower beds were ready for some additional dirt and mulch. Some flowers might not hurt either.
Saturday, April 25, 2009
Gutters
I finally got around to re-hanging the gutters. The gutters had been removed when we put on the new roof. I wanted to install fascia boards and then rehang the gutters. I also wanted to re-route the water flow.
All of the water from the front of the house was routed to the drainage tile in the back of the house. When that tile clogged, the water backed up until it started to flow to the front tile. The logical step was to drain the front of the house to the front drainage tile, and the back of the house to the back tile. This should help even out the drainage and eliminate the pooling of water towards the back of the house.
Sunday, April 12, 2009
Spring Time Means Only One Thing
Yep, It is spring time, the season of rebirth. Where life blooms from the dead of winter. Here at the cottage, it is easy to see the signs of Spring. The birds are out singing, the ice has melted off the water, the grass is starting to turn green, and the holding tank needs to be cleaned. I hope the sewers are really only a few years away.
Saturday, April 11, 2009
The Benefits of Winterization
Our place does not have heat, so every winter we are required to turn off the water supply, drain the lines and winterize the systems. In theory, this is a simply task. The application of the theory has not been so easy this year.
We arrived at the cottage and found the pump cracked from freezing. This means that I did not get all of the water drained, and the freezing temperatures cracked the head. We also discovered that the shower cartridge was also a victim of the temperatures. Both of these issues are a result of improper winterization. I did not get the line blown out completely, and I paid the price.
Wednesday, September 03, 2008
Primer and Paint
CMV stayed an extra day and decided to apply the first coat of primer to the new floor in the porch. The wood that we used (pine) is really going to soak up the paint, so a good layer of primer is essential.
We are taking a week off from going to the cottage, so we will apply the second coat the following week. We should be able to start painting on Sunday before we leave. We would be able to actually paint on Saturday, but by waiting an extra day, we give it the week to dry with no one walking in and out of the house.
We returned and painted the floor a dark green. The color was originally intended to be our accent color for the exterior of the house, but I am not sure we are feeling the same way at this point. We have decided to hold off on replacing the siding, so we might not change much. The painted floor is going to show the evidence of wear and tear along with normal foot traffic. It may force us to give it a touch up every so often.
Tuesday, September 02, 2008
Building and Installing the Floor
I had a basic idea of what we wanted to do for a floor in the porch. I drove up to the cottage on Friday and stopped at Home Depot on the way up. I wanted to buy the pine planks for the floor. We had decided to use 1x3 boards and run the the narrow length of the porch.
We also decided to keep this as a floating floor. We think that we might need to pull up the floor from time to time. If we attached it, we run the risk of cracking the concrete floor, and eliminate the ability to clean under the wood.

I started out by laying runners and then cutting the planks to the proper length. After a dry fit, the planks were screwed into the runners from the underside. The finished section was then turned over and lowered into place. The first section is five feet in length.

The second section was prepared in the same manner. The last plank of the first section was set so the runners of the second section lock into place by sliding underneath the first section. The second section measures slightly less than five feet.

The third section is slightly longer then three feet. It simply sits on top of the second section. I do not have a way to lock this section into place without driving some screws into the runners of the second section. I hesitate to use screws, as these would be visible. If we feel that it is necessary to secure this section into place, I will go back and screw it down.

I built caps at the front door and at the doorway the leads to the hallway. This has helped with the movement of the last section. These two caps are not part of the section; they are individual pieces that fit under and against the section.
The next step in this project is to paint the floor. We will need to prime it first and then cover it with a tough finish.
We also decided to keep this as a floating floor. We think that we might need to pull up the floor from time to time. If we attached it, we run the risk of cracking the concrete floor, and eliminate the ability to clean under the wood.

I started out by laying runners and then cutting the planks to the proper length. After a dry fit, the planks were screwed into the runners from the underside. The finished section was then turned over and lowered into place. The first section is five feet in length.

The second section was prepared in the same manner. The last plank of the first section was set so the runners of the second section lock into place by sliding underneath the first section. The second section measures slightly less than five feet.

The third section is slightly longer then three feet. It simply sits on top of the second section. I do not have a way to lock this section into place without driving some screws into the runners of the second section. I hesitate to use screws, as these would be visible. If we feel that it is necessary to secure this section into place, I will go back and screw it down.

I built caps at the front door and at the doorway the leads to the hallway. This has helped with the movement of the last section. These two caps are not part of the section; they are individual pieces that fit under and against the section.
The next step in this project is to paint the floor. We will need to prime it first and then cover it with a tough finish.
Friday, August 22, 2008
Painting the Porch
We have a guest this weekend. CMV's sister BLH is here to visit and help us. The three girls painted the porch. We chose a green that will go nicely with the siding that we picked. CMV went to Lowes to get the paint and found 2 gallons in the clearance section. Someone had mixed 3 gallons of the color, only to have the customer change their mind. We saved quite a bit of money on this paint.

Thanks for the Help BLH!

Thanks for the Help BLH!
Sunday, August 10, 2008
Cleaning out the Porch
We need to clean out the front porch for a number of reasons. It is getting late in the season, and we do not want our paint and supplies to freeze over winter, we are at the point that we can start to take some tools and materials home, and we are anticipating guests over the Labor Day Holiday. We are planning on setting up the futon in the porch as soon as it is complete.
Once the items are removed from the area, CMV and AMV are going to paint the walls and ceiling. Our plan is to install a wooden floor that can be removed in sections if the need arises. I am unsure how dry the area stays in the winter. It has been a bare concrete floor for so long, that I don't know how the elements will treat the wood. We are going to use a pine plank and then paint it to resemble an old porch floor.

The only picture I have is of the porch almost cleaned out. You can see the futon frame and some trim against the wall.
Once the items are removed from the area, CMV and AMV are going to paint the walls and ceiling. Our plan is to install a wooden floor that can be removed in sections if the need arises. I am unsure how dry the area stays in the winter. It has been a bare concrete floor for so long, that I don't know how the elements will treat the wood. We are going to use a pine plank and then paint it to resemble an old porch floor.

The only picture I have is of the porch almost cleaned out. You can see the futon frame and some trim against the wall.
Friday, July 25, 2008
On the Level
We have some problems with the floors. The problem comes to light when we try to lay the tile floor. The kitchen floor has several spots where the tiles pop up, or the grout cracks out as someone walks on the floor. The hallway is giving us the same fits.
There is not a spot in this house that is level. The tiles do not lay flat, and this is the main cause of them popping up. I bought 3 50 pound bags of self-leveling floor cement. It was our hope that we could pour the mixture and end up with a floor that could be tiled.
The floor had a high spot close to the middle, and it ran higher on the left side. We poured two bags of the cement and got the floor to about the highest point that we could. We did not want to get to the point of stepping down into the bedrooms.

The floor is a lot closer to level, but not quite there. We will attempt to lay the tile soon.
There is not a spot in this house that is level. The tiles do not lay flat, and this is the main cause of them popping up. I bought 3 50 pound bags of self-leveling floor cement. It was our hope that we could pour the mixture and end up with a floor that could be tiled.
The floor had a high spot close to the middle, and it ran higher on the left side. We poured two bags of the cement and got the floor to about the highest point that we could. We did not want to get to the point of stepping down into the bedrooms.

The floor is a lot closer to level, but not quite there. We will attempt to lay the tile soon.
Tuesday, July 08, 2008
Mother Nature Finally Cooperates

The dumpster was scheduled for pick-up on Friday, July 4, 2008. We even called to check on the Holiday, and they said that they would get it Friday. We left last weekend with 75 percent of the roof torn off, and quite a lot of that was in the dumpster. If they were going to pick up the container on Friday, we were going to get up there and finish the tear off and get everything in the dumpster.
CMV had the week off, so she drove up on Tuesday. AMV and I would drive up on Thursday after work. We had no idea of when they would arrive to get the dumpster, so we felt the need to be ready as early as possible. CMV was able to get most of the remaining shingles off of the house, so when I got there I helped her drag them over to the container. We also took the opportunity to load up all of the bagged shingles from the first weekend. It was late on Thursday, so we called it a night.
Friday morning and no early truck, so we decided to get up on the roof and remove the very last small section of old shingle. I spent time removing the old staples and nails and checking the decking for bad/ weak spots. This section of the roof was in pretty decent shape. I nailed a few loose spots and started to lay out the roofing felt. CMV finished the tear-off, and we loaded the last of the trash into the dumpster. Four o'clock in the afternoon, and we still have the dumpster in the driveway. If we had planned to load it later in the day, they would have arrived first thing in the morning to haul it away. They ended up arriving Saturday morning.
Once the roofing felt was applied, we nailed in the drip edge and laid down the starter strip. We covered the roof with the tarp and called it a night. It was after all, the 4th of July and we were going out on a friends boat to watch the fireworks over the lake.
Saturday morning and once again, we are up on the roof. I am guessing by now, you are tired of reading how we are on the roof, and I assure you, I am tired of writing it in this journal, but neither compares to how tired we were of actually climbing up the ladder for another day. If we could have done the job in consecutive days, I think it would not have been as bad. Only working on the weekends made the job stretch out over weeks, so it seemed to drag on and on.
We started applying the shingles to the northern section, and made decent time. It was clear that we were not going to have enough shingles to complete the job. When I was calculating the number of bundles we needed, I did not add in enough for the ridge caps. We were also short one piece of drip edge for the gable. CMV would drive up to Goshen in the morning and pick up the last of the materials.
We cut two holes in the roof in the locations we chose for the new roof vents. The old roof did not have any vents. The house only had two gable vents, so we felt that we needed to add some additional airflow. As we cut the holes, it was amazing how much heat came out of the attic. We attached the vents and shingled around them and stopped at the ridge.

Sunday morning, July 6, 2008. We have one last section the shingle, and the ridge caps. I got started on the ridge caps while CMV drove to the store. She arrived with the materials and we nailed in the last piece of drip edge, we shingled the last section of roof, and we finished the last row of shingles along the ridge on the main section of the house. CMV and AMV had pre-cut quite a few ridge pieces, so I was able to finish off the ridge as CMV cut away the excess shingle out of the valleys. We finished fairly late in the day, but we finished.

Next week I will go up and apply some roof cement to some of the shingles around the vents and near the chimney. I will also apply the cement to the outer edge of the shingles on the roof line, to give them some additional holding power against the prevailing wind off of the lake. I may touch up the paint on the chimney, as it still shows some light spots, especially as the sun hits it.
Monday, June 30, 2008
Closing Out The Weekend
Friday the 13th was two weeks ago, but it chose Sunday the 29th to show itself. Nothing was going right today. We had four solid rain delays and lost quite a bit of time waiting. I was able to paint the chimney and get it ready to re-install, but most of the morning was spent removing, rearranging, and adjusting the tarps.
To add additional issues, we plugged in the air compressor, and could not get it to hold pressure. It would build to almost 20 pounds, and not move from there. There was no chance that the Coil nailer would work with that low pressure, so all of the shingles would be attached the old fashioned way, a hammer and nails.
We did get a decent block of dry time at the end of the day. During this break in the rain, CMV made decent progress tearing off shingles from the back of the house, and I nearly finished applying shingles to the front gable.
I placed the chimney down and attached it to the roof. We used the ice and water shield as added protection around the flashing. Looking at the paint job out in the sunlight shows that I need to do some touch up work on the next calm day. We were able to run the shingles up to just short of the roof line. I need to clear out more of the ridge so I can apply one run of felt across the top of the ridge and fold it over to the other side.

I am not happy using this as the end of the weekend shot, because of a couple of items. One, there is a piece of plywood nailed as a spacer where the fascia board will eventually attach. There are a few shingles that hang over the edge of the roof, that should have been trimmed. Lastly, the extra shingle should have been cut out of the metal valley.
We did a lot of work in a short amount of time today, and pushed it until the very end. I really should have put the hammer and nails away 15 minutes earlier than I did, because the rain almost caught us unprepared. We had the tarps on the house, but I had been pulling shingles out of the "weight" packs to use to finish the gable, so when the wind started blowing, the tarps didn't have enough to hold them down properly. I had to bring up another 5 bundles of shingles to use as weight. I should use that as a life lesson, because those bundles seem much heavier at the end of the weekend than they do at the start of the weekend.
To add additional issues, we plugged in the air compressor, and could not get it to hold pressure. It would build to almost 20 pounds, and not move from there. There was no chance that the Coil nailer would work with that low pressure, so all of the shingles would be attached the old fashioned way, a hammer and nails.
We did get a decent block of dry time at the end of the day. During this break in the rain, CMV made decent progress tearing off shingles from the back of the house, and I nearly finished applying shingles to the front gable.
I placed the chimney down and attached it to the roof. We used the ice and water shield as added protection around the flashing. Looking at the paint job out in the sunlight shows that I need to do some touch up work on the next calm day. We were able to run the shingles up to just short of the roof line. I need to clear out more of the ridge so I can apply one run of felt across the top of the ridge and fold it over to the other side.

I am not happy using this as the end of the weekend shot, because of a couple of items. One, there is a piece of plywood nailed as a spacer where the fascia board will eventually attach. There are a few shingles that hang over the edge of the roof, that should have been trimmed. Lastly, the extra shingle should have been cut out of the metal valley.
We did a lot of work in a short amount of time today, and pushed it until the very end. I really should have put the hammer and nails away 15 minutes earlier than I did, because the rain almost caught us unprepared. We had the tarps on the house, but I had been pulling shingles out of the "weight" packs to use to finish the gable, so when the wind started blowing, the tarps didn't have enough to hold them down properly. I had to bring up another 5 bundles of shingles to use as weight. I should use that as a life lesson, because those bundles seem much heavier at the end of the weekend than they do at the start of the weekend.
Roof (Weekend #3)
By all plans, we anticipated that this project would be complete at the end of this weekend. That is the great thing about plans, sometimes they work out, and other times they fail. I will not blame the weather, but just between the two of us, it was the weather that prevented us from finishing this week.
I drove up on Friday morning and got started around noon. My list of priorities was to remove the shingles on the south side of the house, install the drip edge, lay out the roofing felt, apply the starter strip and start laying shingles if time allowed. I folded back the tarp and started removing the three layers of old roof. I was able to work for 2 1/2 hours and then had to cover up for a rain storm. I lost about 2 1/2 hours because of the rain.
After the storm, I was able to climb back up and fold back the tarp and work another 2 1/2 hours. In my 5 hours of working, I was able to get down to the roofing deck, and install the drip edge. I applied the starter strip and covered up for the evening. As I was standing in the livingroom, I realized that I applied the starter strip before I put on the roofing felt. I would need to pull up the strip and apply the felt first thing in the morning.
Saturday, June 28, 2008
It rained quite a bit over night. CMV arrived to find overcast skies and the threat of rain. After a brief shower, we were able to get up on the roof and get started. I removed the starter strip and applied the roofing felt. I the re-applied the starter strip, and attached drip edge on the rake edge. We were ready to shingle.

With the aid of the air compressor and coil nailer, we managed to work our way up the roof close to the top. We attached shingles upto the chimney cutout and stopped for the day. We did not have any more rain, but we had several scares. We have learned to keep the tarps at the ready.
I drove up on Friday morning and got started around noon. My list of priorities was to remove the shingles on the south side of the house, install the drip edge, lay out the roofing felt, apply the starter strip and start laying shingles if time allowed. I folded back the tarp and started removing the three layers of old roof. I was able to work for 2 1/2 hours and then had to cover up for a rain storm. I lost about 2 1/2 hours because of the rain.
After the storm, I was able to climb back up and fold back the tarp and work another 2 1/2 hours. In my 5 hours of working, I was able to get down to the roofing deck, and install the drip edge. I applied the starter strip and covered up for the evening. As I was standing in the livingroom, I realized that I applied the starter strip before I put on the roofing felt. I would need to pull up the strip and apply the felt first thing in the morning.
Saturday, June 28, 2008
It rained quite a bit over night. CMV arrived to find overcast skies and the threat of rain. After a brief shower, we were able to get up on the roof and get started. I removed the starter strip and applied the roofing felt. I the re-applied the starter strip, and attached drip edge on the rake edge. We were ready to shingle.

With the aid of the air compressor and coil nailer, we managed to work our way up the roof close to the top. We attached shingles upto the chimney cutout and stopped for the day. We did not have any more rain, but we had several scares. We have learned to keep the tarps at the ready.
Labels:
"roofing felt",
"starter strip",
asphalt,
drip edge,
Roof,
shingles
Tuesday, June 24, 2008
The Roof (second weekend)
CMV was able to locate a company that can bring a 6 yard dumpster to the cottage. They are located in the lakes area, and have small trucks that drop-off and pick-up the dumpsters. No more bagging. The total charge for the dumpster is $230.00, so when you add the landfill charges and the gas to get there, we are probably saving money.

We drove up to the cottage (CMV, AMV & JMV) Friday night. We wanted to be there to get an early start on Saturday morning. Those of you who know me know that I am definitely a morning person, so you can understand that I was really motivated to get up on the roof first thing. I am not sure of the time when we actually got started, and CMV has not started editing my posts, so it was early.
The weather was not very cooperative this weekend. We had two different rain delays on Saturday and another two on Sunday.
We continued by removing the shingles from the front gable down to the valley. We then cleared the first four feet above the gutters, so I could replace some additional boards on the roof.

With the shingles cleared, we had enough room to prepare the valley for new shingles. We decided to lay down an ice and water shield in the valley and the attach some aluminum flashing. We applied the felt paper to the gable, and will do the same to the adjoining roof next week when all of the shingles are removed.

We drove up to the cottage (CMV, AMV & JMV) Friday night. We wanted to be there to get an early start on Saturday morning. Those of you who know me know that I am definitely a morning person, so you can understand that I was really motivated to get up on the roof first thing. I am not sure of the time when we actually got started, and CMV has not started editing my posts, so it was early.
The weather was not very cooperative this weekend. We had two different rain delays on Saturday and another two on Sunday.
We continued by removing the shingles from the front gable down to the valley. We then cleared the first four feet above the gutters, so I could replace some additional boards on the roof.

With the shingles cleared, we had enough room to prepare the valley for new shingles. We decided to lay down an ice and water shield in the valley and the attach some aluminum flashing. We applied the felt paper to the gable, and will do the same to the adjoining roof next week when all of the shingles are removed.
Labels:
"ice and water shield",
"roofing felt",
dumpster,
Roof,
shingles
Subscribe to:
Posts (Atom)